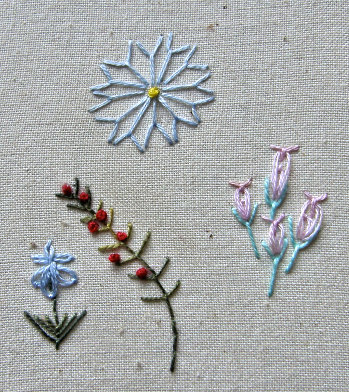
Mastering the Art of Embroidery Techniques
Embroidery is a versatile and creative craft that combines artistry with precision. Mastering the art of embroidery techniques allows you to elevate your designs from simple to spectacular. Whether you are a beginner or an experienced embroiderer, understanding and perfecting various techniques can significantly enhance your projects. This guide covers essential and advanced embroidery techniques, providing step-by-step instructions to help you achieve professional results.
1. Understanding Basic Embroidery Stitches
Before delving into advanced techniques, it’s crucial to master basic embroidery stitches. These foundational stitches serve as the building blocks for more complex designs.
Running Stitch
The running stitch is a fundamental technique used for outlining and creating straight lines in embroidery.
How to Do It: Bring the needle up through the fabric, insert it back down, and continue in a consistent, even pattern.
Applications: Ideal for outlining shapes and adding simple details.
Backstitch
The backstitch creates a solid line by stitching backwards, filling in gaps left by the running stitch.
How to Do It: Start with a stitch, then bring the needle back to the end of the previous stitch and continue forward.
Applications: Perfect for detailed outlines and text.
Satin Stitch
The satin stitch is used to fill in shapes with a smooth, shiny finish.
How to Do It: Work closely spaced parallel stitches to cover the area with a smooth surface.
Applications: Excellent for filling shapes and creating a polished look.
2. Exploring Intermediate Techniques
Once you are comfortable with basic stitches, you can explore intermediate techniques to add more depth and texture to your embroidery.
French Knot
The French knot creates a small, textured bump on the fabric, adding dimension to your designs.
How to Do It: Wrap the thread around the needle a few times, insert it back into the fabric close to where it emerged, and pull through.
Applications: Ideal for adding decorative touches and texture to designs.
Lazy Daisy Stitch
The lazy daisy stitch creates petal-like shapes, perfect for floral designs.
How to Do It: Bring the needle up, form a loop, and secure it with a small stitch at the base of the loop.
Applications: Great for flower petals and simple leaf shapes.
Chain Stitch
The chain stitch forms a series of linked loops, adding texture and a decorative border.
How to Do It: Create a loop with each stitch, connecting them to form a chain-like pattern.
Applications: Useful for borders, outlines, and filling areas with texture.
3. Advanced Embroidery Techniques
For those seeking to push their embroidery skills further, advanced techniques offer new ways to enhance your designs and create unique effects.

Thread Painting
Thread painting mimics the appearance of a painted canvas, using layers of thread to create a detailed, realistic look.
How to Do It: Use free-motion embroidery to layer thread colors, blending and shading to achieve a painterly effect.
Applications: Ideal for realistic portraits, landscapes, and intricate designs.
3D Puff Embroidery
3D puff embroidery adds a raised, three-dimensional effect to your designs, creating a bold, tactile appearance.
How to Do It: Place foam under your fabric and stitch over it with dense stitches to create a puffy effect.
Applications: Perfect for logos, patches, and designs requiring a standout effect.
Appliqué
Appliqué involves sewing fabric pieces onto a base fabric to create layered designs with depth and texture.
How to Do It: Cut out fabric shapes, position them on your base fabric, and stitch around the edges to secure them in place.
Applications: Ideal for adding fabric elements to quilts, garments, and decorative items.
4. Combining Techniques for Unique Results
Combining different embroidery techniques can lead to innovative and striking designs. Here’s how to effectively blend techniques:
Mixing Stitches
Combine basic and advanced stitches to create complex patterns and textures.
How to Do It: Integrate different stitches within your design to highlight areas and add variety.
Applications: Useful for detailed artwork and dynamic designs.
Incorporating Embellishments
Add beads, sequins, or metallic threads to enhance your embroidery projects.
How to Do It: Sew embellishments into your design, ensuring they are securely attached and complement the embroidery.
Applications: Ideal for special occasions, decorative pieces, and enhancing visual appeal.
Experimenting with Fabric and Threads
Explore different fabrics and threads to see how they affect your embroidery.
How to Do It: Test various combinations to find what works best for your design and desired effect.
Applications: Perfect for creating unique textures and effects.
5. Tips for Successful Embroidery
To ensure success in your embroidery projects, follow these tips:
1. Choose the Right Tools
Invest in high-quality needles, threads, and fabrics to achieve the best results.
2. Practice Regularly
Frequent practice helps improve your skills and understanding of different techniques.
3. Plan Your Designs
Careful planning and sketching of your design help in executing it accurately.
4. Stay Creative
Don’t be afraid to experiment with new techniques and ideas to find your unique style.
Conclusion
Mastering the art of embroidery techniques opens up a world of creative possibilities. By mastering basic stitches, exploring intermediate and advanced techniques, and combining methods, you can create stunning and intricate designs. With practice and experimentation, your embroidery skills will grow, allowing you to transform your projects into works of art. Embrace the craft, and let your creativity shine through each stitch.
