Mastering the Art of Embroidery Techniques

Mastering the Art of Embroidery Techniques

Mastering the Art of Embroidery Techniques

Embroidery is a versatile and creative craft that combines artistry with precision. Mastering the art of embroidery techniques allows you to elevate your designs from simple to spectacular. Whether you are a beginner or an experienced embroiderer, understanding and perfecting various techniques can significantly enhance your projects. This guide covers essential and advanced embroidery techniques, providing step-by-step instructions to help you achieve professional results.

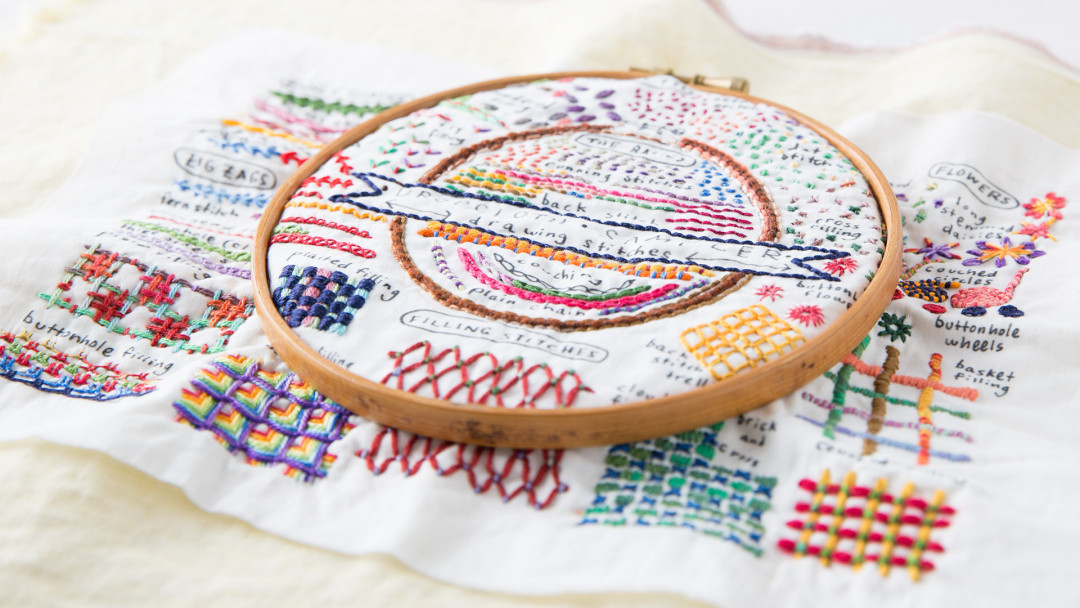
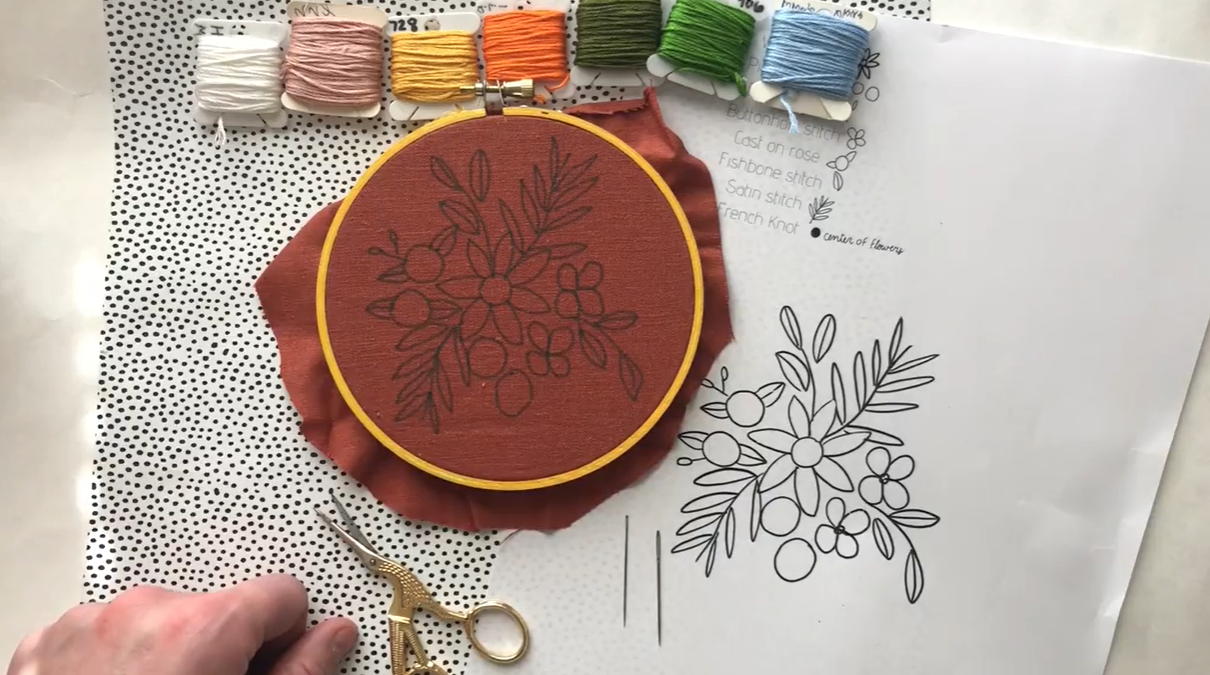
1. Understanding Basic Embroidery Stitches

Before delving into advanced techniques, it’s crucial to master basic embroidery stitches. These foundational stitches serve as the building blocks for more complex designs.

Running Stitch

The running stitch is a fundamental technique used for outlining and creating straight lines in embroidery.

How to Do It: Bring the needle up through the fabric, insert it back down, and continue in a consistent, even pattern.
Applications: Ideal for outlining shapes and adding simple details.

Backstitch

The backstitch creates a solid line by stitching backwards, filling in gaps left by the running stitch.

How to Do It: Start with a stitch, then bring the needle back to the end of the previous stitch and continue forward.
Applications: Perfect for detailed outlines and text.
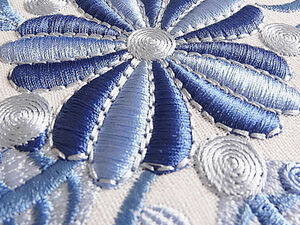
Satin Stitch

The satin stitch is used to fill in shapes with a smooth, shiny finish.

How to Do It: Work closely spaced parallel stitches to cover the area with a smooth surface.
Applications: Excellent for filling shapes and creating a polished look.

2. Exploring Intermediate Techniques

Once you are comfortable with basic stitches, you can explore intermediate techniques to add more depth and texture to your embroidery.

French Knot

The French knot creates a small, textured bump on the fabric, adding dimension to your designs.

How to Do It: Wrap the thread around the needle a few times, insert it back into the fabric close to where it emerged, and pull through.
Applications: Ideal for adding decorative touches and texture to designs.
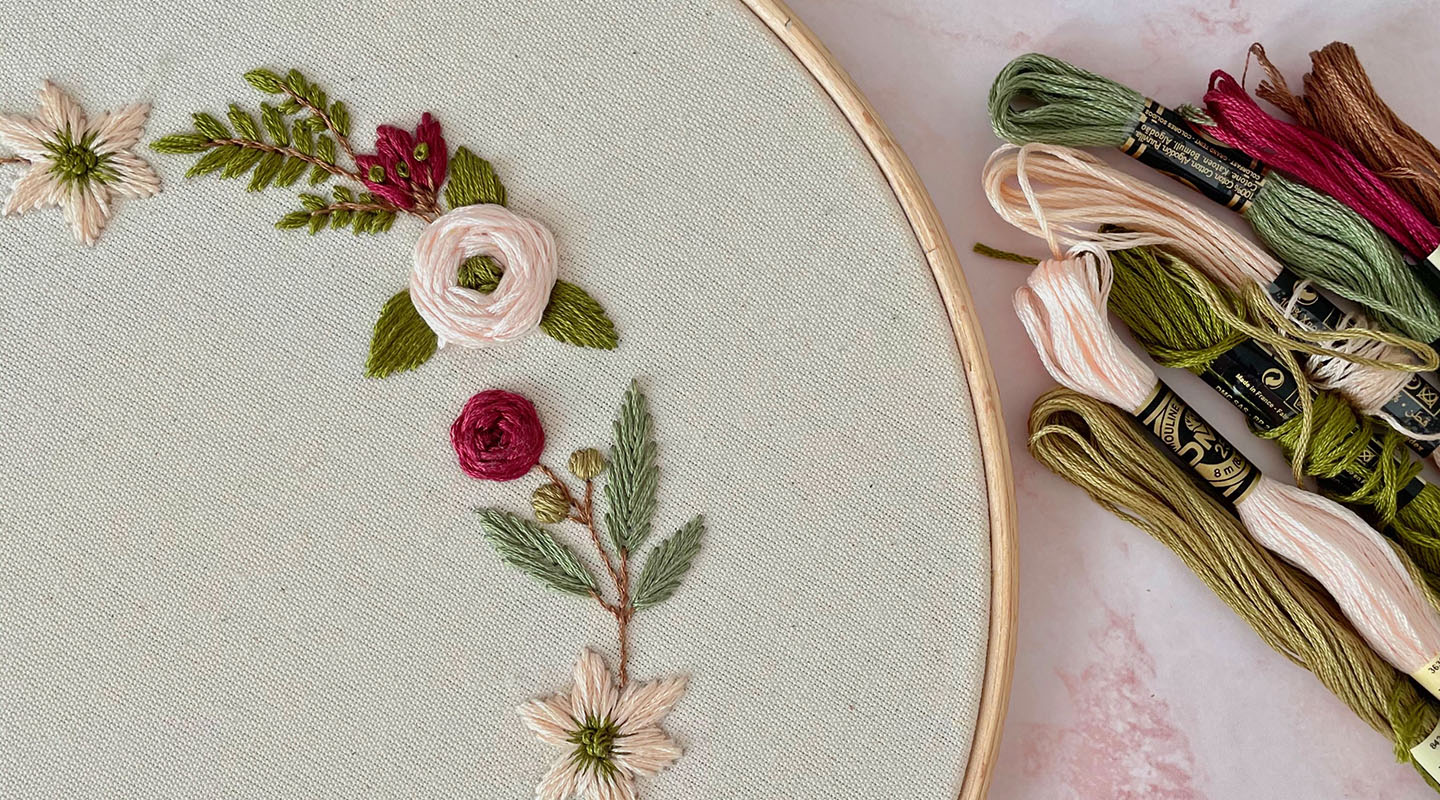
Lazy Daisy Stitch

The lazy daisy stitch creates petal-like shapes, perfect for floral designs.

How to Do It: Bring the needle up, form a loop, and secure it with a small stitch at the base of the loop.
Applications: Great for flower petals and simple leaf shapes.

Chain Stitch

The chain stitch forms a series of linked loops, adding texture and a decorative border.

How to Do It: Create a loop with each stitch, connecting them to form a chain-like pattern.
Applications: Useful for borders, outlines, and filling areas with texture.

3. Advanced Embroidery Techniques

For those seeking to push their embroidery skills further, advanced techniques offer new ways to enhance your designs and create unique effects.
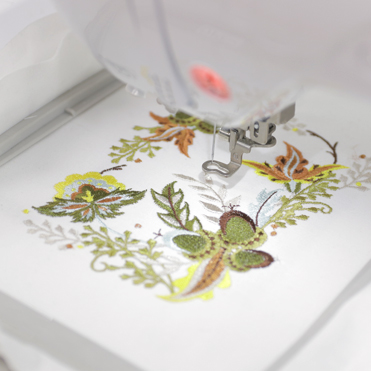
Mastering the Art of Embroidery Techniques

Thread Painting

Thread painting mimics the appearance of a painted canvas, using layers of thread to create a detailed, realistic look.

How to Do It: Use free-motion embroidery to layer thread colors, blending and shading to achieve a painterly effect.
Applications: Ideal for realistic portraits, landscapes, and intricate designs.
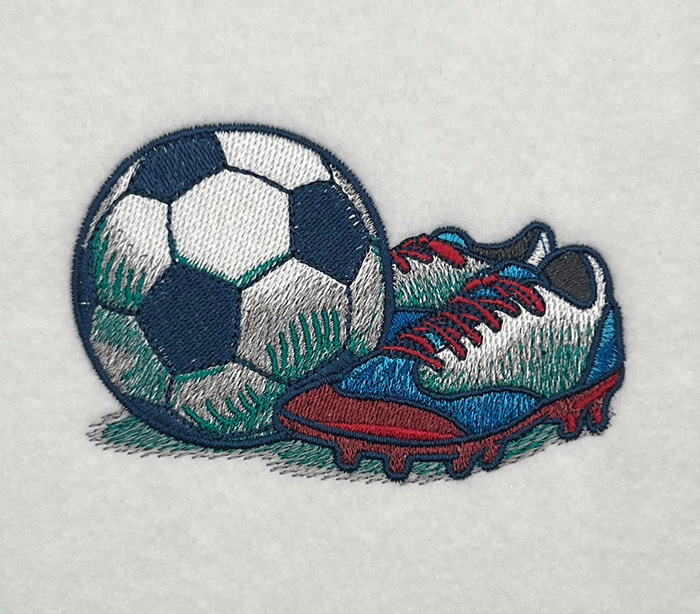
3D Puff Embroidery

3D puff embroidery adds a raised, three-dimensional effect to your designs, creating a bold, tactile appearance.

How to Do It: Place foam under your fabric and stitch over it with dense stitches to create a puffy effect.
Applications: Perfect for logos, patches, and designs requiring a standout effect.

Appliqué

Appliqué involves sewing fabric pieces onto a base fabric to create layered designs with depth and texture.

How to Do It: Cut out fabric shapes, position them on your base fabric, and stitch around the edges to secure them in place.
Applications: Ideal for adding fabric elements to quilts, garments, and decorative items.

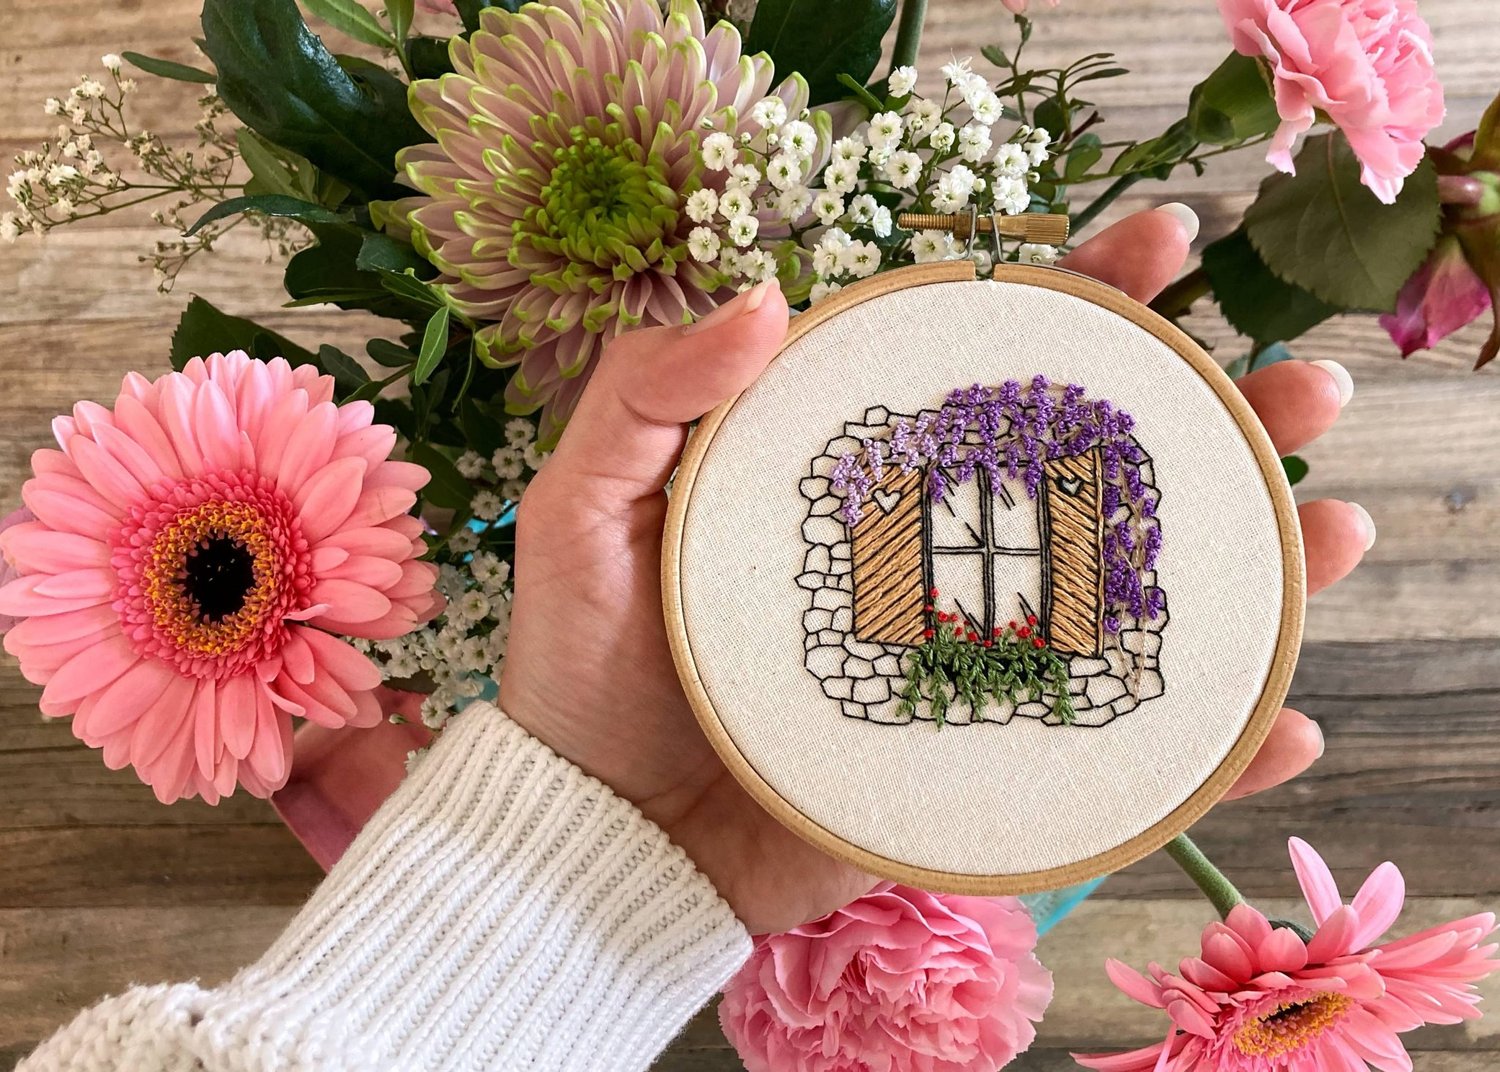
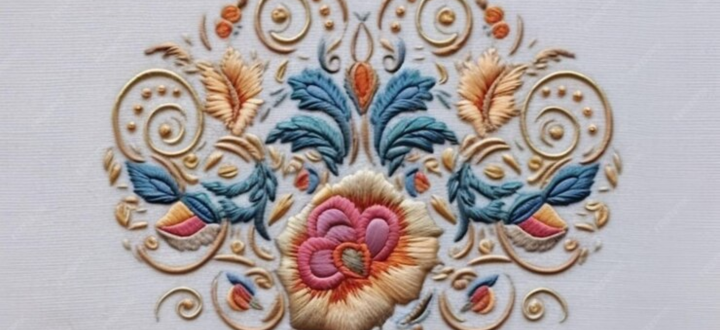
4. Combining Techniques for Unique Results

Combining different embroidery techniques can lead to innovative and striking designs. Here’s how to effectively blend techniques:

Mixing Stitches

Combine basic and advanced stitches to create complex patterns and textures.

How to Do It: Integrate different stitches within your design to highlight areas and add variety.
Applications: Useful for detailed artwork and dynamic designs.

Incorporating Embellishments

Add beads, sequins, or metallic threads to enhance your embroidery projects.

How to Do It: Sew embellishments into your design, ensuring they are securely attached and complement the embroidery.
Applications: Ideal for special occasions, decorative pieces, and enhancing visual appeal.

Experimenting with Fabric and Threads

Explore different fabrics and threads to see how they affect your embroidery.

How to Do It: Test various combinations to find what works best for your design and desired effect.
Applications: Perfect for creating unique textures and effects.

5. Tips for Successful Embroidery

To ensure success in your embroidery projects, follow these tips:

1. Choose the Right Tools

Invest in high-quality needles, threads, and fabrics to achieve the best results.

2. Practice Regularly

Frequent practice helps improve your skills and understanding of different techniques.

3. Plan Your Designs

Careful planning and sketching of your design help in executing it accurately.

4. Stay Creative

Don’t be afraid to experiment with new techniques and ideas to find your unique style.

Conclusion

Mastering the art of embroidery techniques opens up a world of creative possibilities. By mastering basic stitches, exploring intermediate and advanced techniques, and combining methods, you can create stunning and intricate designs. With practice and experimentation, your embroidery skills will grow, allowing you to transform your projects into works of art. Embrace the craft, and let your creativity shine through each stitch.

Transform Your Designs with Innovative Embroidery Techniques

Transform Your Designs with Innovative Embroidery Techniques

Transform Your Designs with Innovative Embroidery Techniques

Embroidery is a timeless craft that has evolved significantly over the years. With innovative techniques, you can breathe new life into your designs, adding dimension, texture, and uniqueness. In this article, we explore several cutting-edge embroidery techniques that can elevate your projects and set them apart. Whether you’re a seasoned embroiderer or a beginner looking to expand your skills, these methods will inspire and transform your work. Transform Your Designs with Innovative Embroidery Techniques

1. Digital Embroidery

Digital embroidery is revolutionizing the craft by combining traditional techniques with modern technology. This method uses computerized embroidery machines to create intricate designs with precision and efficiency.

How Digital Embroidery Works:

1. **Design Creation:** Use embroidery software to create or modify designs. These programs allow you to digitize your artwork and adjust parameters like stitch density and type. 2. **Machine Setup:** Transfer your digital design to an embroidery machine. Set up the fabric, thread, and hoop according to the machine’s instructions. 3. **Embroidery Process:** The machine automatically stitches the design onto the fabric based on the digital file. Monitor the process to ensure everything runs smoothly. 4. **Finishing Touches:** Once the embroidery is complete, remove the fabric from the machine and trim any excess threads.

Benefits:

– **Precision:** Digital embroidery offers high precision, allowing for intricate and complex designs. – **Efficiency:** It speeds up the embroidery process, making it ideal for bulk production. – **Customization:** Easily adjust designs and colors to fit specific needs.

2. 3D Puff Embroidery

3D puff embroidery creates a raised, three-dimensional effect by using foam under the stitches. This technique adds depth and texture to designs, making them stand out.

How to Achieve 3D Puff Embroidery:

1. **Design Selection:** Choose a design with elements that will benefit from a 3D effect. Simple, bold designs work best. 2. **Prepare the Fabric:** Stabilize the fabric with a backing material to support the foam and prevent distortion. 3. **Apply Foam:** Place a layer of embroidery foam on the fabric where you want the 3D effect. Use a temporary adhesive to keep it in place. 4. **Stitching:** Embroider the design using a satin stitch or other dense stitches to cover the foam. The foam will create a raised effect beneath the stitches. 5. **Finishing:** Trim excess foam and ensure the design is securely stitched.

Benefits:

– **Visual Impact:** Adds a striking, three-dimensional look to your designs. – **Textural Appeal:** Provides a tactile quality that enhances the overall design. – **Versatility:** Suitable for various applications, including logos, caps, and patches.

3. Thread Painting

Thread painting, or free-motion embroidery, mimics the appearance of a painted artwork by layering thread in various colors and directions. This technique allows for intricate and realistic designs.

Transform Your Designs with Innovative Embroidery Techniques

Steps for Thread Painting:

1. **Design Preparation:** Choose a design that allows for detailed shading and color transitions. Sketch or print your design on fabric. 2. **Machine Setup:** Use a free-motion embroidery foot and drop the feed dogs on your sewing machine. 3. **Stitching Technique:** Use short, controlled stitches to build up layers of color. Vary your stitch direction and length to create depth and texture. 4. **Blending Colors:** Layer different thread colors to achieve gradients and shading. Blend colors seamlessly for a painterly effect. 5. **Finishing:** Trim excess threads and frame or mount your completed design.

Benefits:

– **Artistic Expression:** Allows for detailed, artistic creations that resemble paintings. – **Customization:** Ideal for unique, personalized designs with rich color and texture. – **Creativity:** Offers endless possibilities for creating intricate and expressive artwork.

4. Metallic and Specialty Threads

Incorporating metallic and specialty threads adds sparkle, shine, and unique effects to your embroidery projects. These threads can elevate the visual appeal of your designs.

How to Use Metallic and Specialty Threads:

1. **Choose Threads:** Select metallic, variegated, or glow-in-the-dark threads that suit your design. Each type offers different effects. 2. **Adjust Machine Settings:** Metallic threads may require adjustments to your machine’s tension and needle settings. Test on a sample fabric. 3. **Stitching:** Use the chosen threads in your design. Metallic threads often work well for highlights, borders, and accent details. 4. **Finish Carefully:** Ensure all threads are secured and trimmed to avoid tangling or fraying.

Benefits:

– **Visual Appeal:** Adds shine and unique effects to your designs. – **Versatility:** Suitable for a wide range of applications, from decorative elements to highlights. – **Creativity:** Enhances the creative potential of your projects with diverse thread options.

5. Appliqué Techniques

Appliqué involves sewing fabric pieces onto a base fabric to create a layered design. This technique adds texture and dimension to your embroidery projects.

Steps for Appliqué Embroidery:

1. **Select Fabric Pieces:** Choose fabrics for the appliqué elements. Cut them into the desired shapes and sizes. 2. **Prepare the Base Fabric:** Stabilize the base fabric to support the appliqué pieces and prevent shifting. 3. **Attach Appliqué:** Position the fabric pieces on the base fabric and use a temporary adhesive or fabric glue to hold them in place. 4. **Sew the Edges:** Use a satin stitch, zigzag stitch, or other decorative stitches to secure the edges of the appliqué pieces. 5. **Finish:** Remove any temporary adhesive and press the fabric to smooth out the design.

Benefits:

– **Layered Effect:** Adds depth and dimension to your designs with layered fabric elements. – **Customizability:** Allows for the creation of complex designs with various fabric textures and patterns. – **Versatility:** Suitable for a wide range of projects, including quilts, garments, and accessories.

6. Embroidery with Beads and Sequins

Adding beads and sequins to your embroidery projects introduces sparkle and texture, enhancing the visual appeal of your designs.

How to Incorporate Beads and Sequins:

1. **Select Embellishments:** Choose beads and sequins that complement your design. Consider color, size, and type. 2. **Plan Placement:** Decide where to place the beads and sequins. You can create patterns or scatter them randomly. 3. **Sew in Place:** Use a needle and thread to sew beads and sequins onto your fabric. For beads, sew through the center; for sequins, sew through the holes. 4. **Finish:** Ensure all embellishments are securely attached and trim any excess threads.

Benefits:

– **Added Sparkle:** Provides a shimmering effect that catches the light. – **Enhanced Texture:** Adds a tactile quality to your designs. – **Versatility:** Suitable for a variety of applications, from formal wear to decorative home items.

Tips for Successful Innovative Embroidery

To make the most of innovative embroidery techniques, keep these tips in mind:

1. Experiment and Practice

Experiment with different techniques and materials to discover what works best for your designs. Practice regularly to improve your skills and achieve better results.

2. Invest in Quality Tools

High-quality embroidery machines, threads, and tools can significantly impact the outcome of your projects. Invest in reliable equipment to ensure professional results.

3. Plan Your Designs Carefully

Careful planning and design selection are crucial for successful innovative embroidery. Choose designs and techniques that complement each other for a cohesive final product.

4. Stay Creative and Inspired

Stay inspired by exploring new techniques and trends in embroidery. Creativity is key to transforming your designs and achieving unique, standout results.

Conclusion

Innovative embroidery techniques offer endless possibilities for transforming your designs and taking your craft to new heights. From digital embroidery and 3D puff effects to thread painting and specialty threads, each technique adds its own unique flair. By embracing these methods and experimenting with new ideas, you can create stunning, professional-quality embroidery projects that showcase your creativity and skill.

Explore these innovative techniques and let your embroidery designs shine with originality and elegance!

Exploring Specialty Stitches in Embroidery

Exploring Specialty Stitches in Embroidery

Exploring Specialty Stitches in Embroidery

Embroidery is a versatile art form that goes beyond basic stitches to include a range of specialty stitches. These stitches add unique textures, patterns, and intricacies to embroidery projects, making them stand out. In this guide, we will explore several specialty stitches, providing detailed instructions and tips for incorporating them into your designs. Exploring Specialty Stitches in Embroidery

1. The Bullion Knot

The bullion knot is a versatile stitch that creates a raised, textured effect. It’s often used for creating floral designs, textures, and embellishments.

How to Create a Bullion Knot:

1. **Thread Your Needle:** Use a length of thread and a needle suitable for the fabric and thread type. 2. **Prepare the Fabric:** Bring the needle up from the back of the fabric at your desired knot location. 3. **Wrap the Thread:** Wrap the thread around the needle several times (usually 6-8) while holding the wraps in place with your thumb. 4. **Insert the Needle:** Insert the needle back into the fabric close to the point where it came out, but not through the wraps. 5. **Pull Through:** Gently pull the needle through the wraps, creating a knot. Adjust the knot to ensure it’s even and secure.

Uses:

– **Floral Designs:** Ideal for creating flower centers and textured petals. – **Textured Effects:** Perfect for adding dimension to various design elements.

2. The Lazy Daisy Stitch

The lazy daisy stitch, also known as the detached chain stitch, creates charming, looped shapes that resemble flower petals. It’s a favorite for creating floral and leaf designs.

How to Create a Lazy Daisy Stitch:

1. **Start with a Stitch:** Bring the needle up from the back of the fabric where you want the base of the petal to be. 2. **Form the Loop:** Create a loop by inserting the needle back into the fabric slightly to the side of the starting point. 3. **Secure the Loop:** Bring the needle up again at the base of the loop, securing the loop in place with a small stitch. 4. **Complete the Petal:** Continue this process to create additional petals, if desired.

Uses:

– **Flower Petals:** Ideal for creating daisy-like petals and other rounded shapes. – **Decorative Elements:** Great for adding decorative and whimsical touches to designs.

3. The French Knot

The French knot is a decorative stitch that adds texture and dimension to embroidery projects. It’s often used to create small, raised details like flower centers or tiny embellishments.

How to Create a French Knot:

1. **Bring the Needle Up:** Start by bringing the needle up from the back of the fabric to the front at the location of the knot. 2. **Wrap the Thread:** Wrap the thread around the needle 2-3 times while holding the wraps in place. 3. **Insert the Needle:** Insert the needle back into the fabric close to where it came out. 4. **Pull Through:** Pull the thread through, keeping the wraps tight to form a knot. Adjust the knot to ensure it’s neat and secure.

Uses:

– **Flower Centers:** Ideal for creating detailed flower centers and small accents. – **Textural Elements:** Perfect for adding texture and small decorative details.

4. The Feather Stitch

The feather stitch is a versatile stitch that creates a feather-like pattern. It’s commonly used for creating decorative borders, leaf patterns, and textures.

How to Create a Feather Stitch:

1. **Begin with a Stitch:** Start by bringing the needle up from the back of the fabric at one end of the stitch. 2. **Create the First Loop:** Make a diagonal stitch to one side, then bring the needle up at the end of the stitch. 3. **Form the Feather Shape:** Continue making diagonal stitches on both sides, working in a feather-like pattern. Overlap the stitches slightly to create a cohesive design. 4. **Complete the Design:** Repeat the process to create a series of feather stitches, adjusting the length and angle for the desired effect.

Uses:

– **Borders and Edges:** Ideal for creating decorative borders and edges. – **Leaf Patterns:** Perfect for creating textured leaf designs and other natural elements.

5. The Fly Stitch

The fly stitch is a versatile stitch that resembles a small wing or arrow. It’s often used for creating small, decorative elements and fills.

How to Create a Fly Stitch:

1. **Start with a Stitch:** Bring the needle up from the back of the fabric at your starting point. 2. **Form the Fly Shape:** Make a small diagonal stitch, then bring the needle back up at the end of the stitch. 3. **Create the Wings:** Form another diagonal stitch from the end of the first stitch, creating a fly-like shape. 4. **Secure the Stitch:** Bring the needle back down at the base of the stitch to secure it in place.

 Stitches in Embroidery

Uses:

– **Decorative Details:** Ideal for adding small, decorative elements and accents. – **Fill Patterns:** Perfect for filling small areas with a unique texture.

6. The Buttonhole Stitch

The buttonhole stitch, also known as the eyelet stitch, creates a decorative edge or hole. It’s often used for creating buttonholes or as a decorative stitch for edges.

How to Create a Buttonhole Stitch:

1. **Prepare the Fabric:** Mark the area where you want to create the buttonhole or decorative edge. 2. **Start Stitching:** Bring the needle up from the back of the fabric at the beginning of the buttonhole. 3. **Create the Stitch:** Make a small stitch around the edge, working in a loop to form a decorative border. 4. **Finish the Stitch:** Continue stitching until you have completed the buttonhole or edge, then secure the thread at the back.

Uses:

– **Buttonholes:** Ideal for creating functional and decorative buttonholes. – **Decorative Edges:** Perfect for adding decorative borders and finishes to designs.

Tips for Mastering Specialty Stitches

To excel in using specialty stitches, keep these tips in mind:

1. Practice Regularly

Regular practice is essential for mastering specialty stitches. Work on sample pieces to improve your technique and gain confidence.

2. Use the Right Tools

Choose appropriate needles, threads, and fabrics for each specialty stitch. The right tools can make a significant difference in the outcome of your project.

3. Experiment with Techniques

Don’t be afraid to experiment with different specialty stitches and combinations. Innovation can lead to unique and beautiful designs.

4. Pay Attention to Detail

Specialty stitches often require precision and attention to detail. Take your time to ensure that each stitch is neat and well-executed.

Conclusion

Exploring specialty stitches in embroidery opens up a world of creative possibilities. From the textured bullion knot to the elegant feather stitch, each specialty stitch offers unique ways to enhance your designs. By mastering these techniques and incorporating them into your projects, you can achieve stunning, professional results and take your embroidery skills to the next level.

Embrace the beauty and complexity of specialty stitches, and let your creativity shine in every stitch!

Advanced Embroidery Techniques for Professional Results

Advanced Embroidery Techniques for Professional Results

Advanced Embroidery Techniques for Professional Results

Embroidery is a craft that evolves from simple stitches to intricate and sophisticated designs. For those looking to elevate their embroidery skills, mastering advanced techniques is key to achieving professional results. This article explores advanced embroidery techniques, providing step-by-step instructions and tips for creating stunning and high-quality designs.

1. Exploring 3D Embroidery

3D embroidery adds depth and dimension to designs, making them stand out with a tactile quality. This technique is often used for logos, patches, and decorative elements.

How to Create 3D Embroidery:

1. **Choose Your Design:** Start with a design that has elements you want to raise or add dimension to. 2. **Prepare Your Fabric:** Use a stabilizer to support the fabric and prevent puckering. 3. **Stitch the Base:** Embroider the base of your design using a standard stitch to create the foundation. 4. **Add Dimension:** Use techniques like satin stitching or puff embroidery foam to create a raised effect. Place foam or batting under the stitches to add height. 5. **Finish and Secure:** Once the 3D effect is achieved, trim any excess foam and secure the stitches to ensure durability.

Uses:

– **Logos and Patches:** Ideal for adding depth to logos and patches. – **Decorative Elements:** Perfect for enhancing decorative designs with a 3D effect.

2. Mastering Stumpwork

Stumpwork is a form of raised embroidery that creates intricate, three-dimensional designs. It involves techniques such as padding and wire framing to achieve a sculptural effect.

How to Create Stumpwork:

1. **Select Your Design:** Choose a design with elements that can benefit from a raised effect, such as flowers or insects. 2. **Prepare the Base:** Start with a solid base using fabric and stabilizer. 3. **Add Padding:** Use materials like felt or batting to pad the areas you want to raise. Secure the padding with small stitches. 4. **Wire Framing:** Incorporate wire to create structural elements, such as stems or antennae. Shape the wire and secure it with stitches. 5. **Embroider the Surface:** Cover the padded and wired areas with decorative stitches to complete the stumpwork effect.

Uses:

– **Floral Designs:** Ideal for creating lifelike flowers with a raised appearance. – **Insects and Animals:** Perfect for detailed and dimensional representations of insects and animals.

3. Exploring Thread Painting

Thread painting, also known as free-motion embroidery, uses thread to create intricate, painted-like designs. It allows for a high level of detail and realism.

How to Create Thread Painting:

1. **Prepare Your Design:** Choose a design that will benefit from detailed shading and color blending. 2. **Set Up Your Machine:** Use a free-motion embroidery foot and drop the feed dogs on your sewing machine. 3. **Start Stitching:** Use short, controlled stitches to build up layers of color and texture. Vary your stitch length and direction for a more natural look. 4. **Blend Colors:** Layer different thread colors to create shading and depth. Use techniques like blending and shading to achieve a painterly effect. 5. **Finish and Frame:** Once your design is complete, trim excess threads and frame or mount your embroidery as desired.

Uses:

– **Portraits and Landscapes:** Ideal for creating detailed and realistic portraits and landscapes. – **Artistic Projects:** Perfect for artistic and expressive embroidery projects.

4. Incorporating Beadwork and Sequins

Beadwork and sequins add sparkle and texture to embroidery projects, enhancing their visual appeal. This technique is often used in evening wear and decorative accessories.

How to Add Beadwork and Sequins:

1. **Choose Your Embellishments:** Select beads and sequins that complement your design. Consider color, size, and texture. 2. **Plan Your Placement:** Decide where to place the beads and sequins in your design. You can create patterns or scatter them for a more random effect. 3. **Secure Beads and Sequins:** Use a needle and thread to sew beads and sequins onto your fabric. For beads, sew through the center, and for sequins, sew through a hole. 4. **Finish the Design:** Secure all embellishments and ensure they are firmly attached. Trim any excess threads and ensure the design is neat.

Uses:

– **Evening Wear:** Ideal for adding sparkle to evening gowns and formal wear. – **Decorative Accessories:** Perfect for embellishing accessories like handbags and jewelry.

Advanced Embroidery Techniques for Professional Results

5. Using Specialty Threads

Specialty threads, such as metallic, variegated, and glow-in-the-dark threads, can add unique effects and textures to your embroidery projects.

How to Use Specialty Threads:

1. **Select Your Thread:** Choose the type of specialty thread that suits your design. Metallic threads add shine, while variegated threads provide color transitions. 2. **Adjust Tension:** Specialty threads may require adjustments to your machine’s tension settings. Test on a scrap piece of fabric to get the right tension. 3. **Stitch with Care:** Use appropriate needle types for specialty threads. For metallic threads, a needle with a larger eye may be necessary to prevent fraying. 4. **Finish the Design:** Ensure all specialty threads are secured and trimmed neatly.

Uses:

– **Highlighting Details:** Ideal for highlighting specific areas in your design. – **Adding Unique Effects:** Perfect for creating unique and eye-catching embroidery.

Tips for Achieving Professional Results

To ensure your advanced embroidery projects turn out with professional results, keep these tips in mind:

1. Use High-Quality Materials

Invest in high-quality fabrics, threads, and tools. Quality materials result in a more polished and durable finish.

2. Practice Precision

Advanced techniques require precision and attention to detail. Practice your techniques regularly to improve accuracy and consistency.

3. Invest in the Right Tools

Using the right tools, such as specialty needles and presser feet, can make a significant difference in the outcome of your projects.

4. Experiment and Innovate

Don’t be afraid to experiment with different techniques and materials. Innovation can lead to unique and personalized designs.

Conclusion

Mastering advanced embroidery techniques can transform your projects from simple to spectacular. By exploring 3D embroidery, stumpwork, thread painting, beadwork, and specialty threads, you can achieve professional results and elevate your craft. With practice and experimentation, you’ll be able to create stunning, intricate designs that showcase your skill and creativity.

Embrace these advanced techniques and let your embroidery projects reflect your expertise and artistic vision!

Step-by-Step Guide to Classic Embroidery Stitches

Step-by-Step Guide to Classic Embroidery Stitches

Step-by-Step Guide to Classic Embroidery Stitches

Embroidery is a traditional craft that has been cherished for centuries. Classic embroidery stitches are the foundation of many beautiful and intricate designs. Whether you’re a novice or an experienced stitcher, understanding these essential stitches can greatly enhance your embroidery projects. This guide will take you through step-by-step instructions for some of the most classic embroidery stitches.

1. The Running Stitch

The running stitch is one of the simplest and most versatile stitches in embroidery. It forms a series of small, evenly spaced stitches in a line.

How to Do It:

1. **Thread Your Needle:** Start by threading your needle with embroidery floss and knotting the end. 2. **Begin Stitching:** Insert the needle from the back of the fabric to the front at your starting point. 3. **Create Stitches:** Move the needle forward in a straight line, keeping stitches evenly spaced. 4. **Finish Off:** Continue stitching until the desired length is reached. Secure the thread at the back of the fabric with a small knot.

Uses:

– **Outlining:** Ideal for outlining shapes and designs. – **Filling Areas:** Can be used to fill small areas with a simple pattern.

2. The Satin Stitch

The satin stitch is known for its smooth, shiny finish. It is often used to fill shapes and create a polished look.

How to Do It:

1. **Outline Your Shape:** Draw or trace the shape you want to fill. 2. **Start Stitching:** Begin at one edge of the shape, bringing the needle up from the back of the fabric. 3. **Fill the Shape:** Place each stitch closely together, working from one edge to the other. Ensure that the stitches are parallel and cover the entire shape. 4. **Secure the End:** Finish by securing the thread at the back of the fabric.

Uses:

– **Filling Large Areas:** Perfect for filling in larger shapes and areas. – **Creating a Glossy Finish:** Ideal for designs that require a smooth, reflective surface.

3. The French Knot

The French knot adds texture and dimension to embroidery projects. It’s commonly used for creating small decorative elements like flowers.

How to Do It:

1. **Bring the Needle Up:** Start by bringing the needle up from the back of the fabric to the front at the desired knot location. 2. **Wrap the Thread:** Wrap the thread around the needle two to three times. 3. **Insert the Needle:** Insert the needle back into the fabric close to the point where it came out. 4. **Pull Through:** Pull the thread tight to form a knot. Ensure the knot is snug but not too tight to avoid puckering.

Uses:

– **Decorative Elements:** Ideal for creating small, textured details in designs. – **Flowers and Centers:** Commonly used for flower centers and other intricate designs.

4. The Chain Stitch

The chain stitch creates a series of interlocking loops, forming a chain-like pattern. It’s a versatile stitch used for outlining and filling.

Step-by-Step Guide to Classic Embroidery Stitches

How to Do It:

1. **Start the Chain:** Bring the needle up through the fabric and create a loop by inserting the needle back into the fabric, slightly to the side of the starting point. 2. **Form the Chain:** Pull the thread through to create a loop. Continue stitching by forming additional loops, connecting each one to the previous stitch. 3. **Finish the Stitch:** Repeat the process until the desired length or pattern is achieved. Secure the thread at the back of the fabric. https://www.industrialandsafetywarehouse.com.au/

Uses:

– **Borders and Outlines:** Ideal for creating decorative borders and outlines. – **Filling Patterns:** Can be used to fill in shapes with a textured look.

5. The Backstitch

The backstitch is a strong and versatile stitch used for outlining and adding detail. It creates a solid, continuous line.

How to Do It:

1. **Begin Stitching:** Start by bringing the needle up from the back of the fabric at your starting point. 2. **Stitch Backwards:** Insert the needle back into the fabric a short distance behind the starting point, then bring it up again at the end of the first stitch. 3. **Continue Forward:** Repeat this process, stitching backward and then forward to create a continuous line. 4. **Finish Off:** Secure the thread at the end of your line with a small knot on the back of the fabric.

Uses:

– **Outlining and Detailing:** Perfect for outlining designs and adding fine details. – **Strong Lines:** Useful for creating durable, solid lines in embroidery.

6. The Lazy Daisy Stitch

The lazy daisy stitch is often used to create flower petals and other rounded shapes. It’s a simple yet effective stitch for adding decorative elements.

How to Do It:

1. **Create a Loop:** Bring the needle up from the back of the fabric at the base of the petal. 2. **Form the Petal:** Create a loop with the thread by bringing the needle back down into the fabric, leaving a loop on top. 3. **Secure the Petal:** Insert the needle back into the fabric close to the base of the loop to secure the petal in place. 4. **Repeat:** Continue creating additional petals by repeating the process.

Uses:

– **Flower Petals:** Ideal for creating daisy-like petals and other rounded shapes. – **Decorative Patterns:** Great for adding decorative, rounded elements to designs.

Tips for Successful Embroidery

To ensure your embroidery projects turn out beautifully, keep these tips in mind:

1. Choose the Right Fabric

Select a fabric that suits the type of stitch and design you’re working on. Sturdier fabrics like cotton and linen work well for most embroidery stitches.

2. Use Quality Threads

Invest in high-quality embroidery threads for a more polished and professional look. Different threads, such as cotton, silk, or metallic, can offer various finishes.

3. Practice Consistency

Maintaining consistent stitch size and spacing will give your embroidery a more uniform appearance. Practice regularly to improve your technique.

4. Keep Your Needles Sharp

Using sharp needles will make stitching easier and more enjoyable. Replace dull needles to avoid fabric snags and uneven stitches.

Conclusion

Mastering classic embroidery stitches opens up a world of creative possibilities. By learning and practicing these fundamental techniques, you can enhance your embroidery skills and create stunning designs. From outlining and filling to adding texture and detail, each stitch offers unique characteristics that can bring your projects to life.

Whether you’re a beginner or an experienced embroiderer, this step-by-step guide to classic embroidery stitches provides a solid foundation for your craft. Embrace these techniques, and let your creativity flourish in every stitch!

The Art of Hand Embroidery: Essential Techniques and Tips

The Art of Hand Embroidery: Essential Techniques and Tips

The Art of Hand Embroidery: Essential Techniques and Tips

Hand embroidery is a timeless craft that allows for endless creativity and personal expression. Whether you’re a seasoned stitcher or a beginner eager to learn, mastering the essential techniques and understanding the best practices can elevate your embroidery projects. In this guide, we’ll explore the foundational techniques of hand embroidery and provide useful tips to help you create beautiful and intricate designs. Discover “The Art of Hand Embroidery: Essential Techniques and Tips” to master foundational stitches, explore advanced techniques

Understanding Hand Embroidery

Hand embroidery is a technique of decorating fabric with needle and thread. It has been practiced for centuries and is known for its intricate and detailed designs. The beauty of hand embroidery lies in its versatility and the ability to personalize and customize designs. From simple stitches to complex patterns, hand embroidery offers a range of possibilities for creative expression.

Types of Hand Embroidery

There are several styles of hand embroidery, each with its unique characteristics:

Surface Embroidery: This is the most common form, where designs are stitched on the surface of the fabric. It includes techniques like satin stitch, French knots, and chain stitch.

Counted Thread Embroidery: In this style, stitches are counted and worked over a grid, such as in cross-stitch or blackwork.

Freestyle Embroidery: This technique allows for free-form stitching without a pre-drawn design. It often combines various stitches and techniques for a unique effect.

Essential Hand Embroidery Techniques

To achieve stunning embroidery results, it’s crucial to master several basic techniques. Here are some fundamental stitches and methods every embroiderer should know:

1. The Running Stitch

The running stitch is one of the simplest stitches used in hand embroidery. It creates a dashed line and is often used for outlining or filling small areas.

How to Do It:

Thread your needle and tie a knot at the end.
Insert the needle from the back of the fabric to the front.
Move the needle forward in a straight line, keeping the stitches evenly spaced.
Repeat the process until the desired length is covered.

2. The Satin Stitch

The satin stitch is used to fill in shapes with a smooth, shiny finish. It’s ideal for covering larger areas and achieving a polished look.

How to Do It:

Outline the shape you want to fill.
Start stitching from one edge of the shape to the other, placing each stitch closely together.
Continue stitching until the entire shape is filled.

The Art of Hand Embroidery: Essential Techniques and Tips

3. The French Knot

The French knot adds texture and dimension to your embroidery. It’s often used for decorative elements like flowers or eyes.

How to Do It:

Bring the needle to the surface of the fabric.
Wrap the thread around the needle twice.
Insert the needle back into the fabric close to where it came out.
Pull the thread tight to form a knot.

4. The Chain Stitch

The chain stitch is versatile and can be used for outlining or filling in patterns. It creates a series of interlocking loops.

How to Do It:

Start with a single stitch, bringing the needle up through the fabric.
Create a loop by inserting the needle back into the fabric, slightly to the side of the starting point.
Pull the thread through to form a chain link.
Repeat to continue the chain.

Tips for Successful Hand Embroidery

Mastering hand embroidery takes practice and patience. Here are some tips to help you along the way:

1. Choose the Right Fabric

Selecting the right fabric is crucial for successful embroidery. Fabrics like cotton, linen, and even denim work well for hand embroidery. Ensure the fabric is stable and not too slippery to avoid distortion in your design.

2. Use Quality Threads

Investing in high-quality embroidery threads can make a significant difference. Threads that are smooth and have a consistent color will result in a cleaner, more professional look. Cotton and silk threads are popular choices for their sheen and durability. https://www.industrialandsafetywarehouse.com.au/embroidery-in-sydney/

3. Keep Your Needles Sharp

Using sharp needles is essential for clean stitching. Dull needles can cause the fabric to snag or create uneven stitches. Regularly replace needles to maintain optimal performance.

4. Practice on Scrap Fabric

Before starting on your final piece, practice your stitches on a scrap piece of fabric. This allows you to perfect your technique and avoid mistakes on your main project.

5. Pay Attention to Tension

Maintaining consistent thread tension is key to achieving uniform stitches. Avoid pulling the thread too tight, as this can cause puckering in the fabric. Practice to find the right balance for smooth, even stitches.

6. Use an Embroidery Hoop

An embroidery hoop keeps the fabric taut, making it easier to stitch and preventing distortion. Adjust the hoop as needed to keep the fabric smooth and wrinkle-free.

Advanced Techniques and Ideas

Once you’ve mastered the basics, you may want to explore more advanced techniques and creative ideas:

1. Appliqué

Appliqué involves sewing a piece of fabric onto a larger piece to create a design. It’s a great way to add texture and dimension to your embroidery projects.

2. Embroidered Monograms

Personalize your projects with embroidered monograms. This technique involves stitching initials or names, adding a unique and personal touch to your creations.

3. Mixed Media

Combine hand embroidery with other craft techniques like painting or beading for a mixed-media approach. This adds depth and interest to your projects.

Conclusion

Hand embroidery is a beautiful and rewarding craft that offers endless possibilities for creativity. By mastering essential techniques and following these tips, you can create stunning and personalized designs. Whether you’re embellishing clothing, creating home décor, or crafting unique gifts, hand embroidery allows you to bring your artistic vision to life.

With practice and patience, you’ll be able to explore advanced techniques and develop your own style. Embrace the art of hand embroidery and let your creativity flourish!

The Art of Sports Gear Embroidery

The Art of Sports Gear Embroidery

The Art of Sports Gear Embroidery

Sports gear embroidery is more than just a way to brand apparel—it’s a sophisticated art form that combines creativity, precision, and technology. From enhancing team identity to adding a professional touch, embroidery plays a crucial role in sports apparel. This article delves into the art of sports gear embroidery, exploring its significance, techniques, and the design principles that make it an essential part of sports branding.

The Significance of Embroidery in Sports Gear

Embroidery is a vital element in sports gear, offering numerous benefits beyond mere decoration. Here’s why it holds such importance:

1. Enhancing Team Identity

Embroidered logos, names, and numbers on sports gear help establish and reinforce team identity. This visual representation fosters a sense of belonging and pride among players and supporters. By showcasing team colors and emblems, embroidery unites team members and creates a strong, recognizable image that resonates both on and off the field.

2. Projecting Professionalism

High-quality embroidery lends a polished, professional appearance to sports gear. Well-executed embroidery elevates the look of uniforms, making teams appear more organized and serious about their sport. This professional image can boost team confidence and create a positive impression on opponents and spectators.

3. Providing Personalization

Embroidery allows for customization, offering players personalized items such as jerseys with their names and numbers. This personal touch not only enhances player satisfaction but also makes it easier to identify team members during games and practices. Personalized gear adds a unique element to the team’s appearance and strengthens individual connections to the team.

Techniques in Sports Gear Embroidery

The art of embroidery involves various techniques that contribute to the final appearance and durability of the gear. Here are some key techniques used in sports gear embroidery:

1. Standard Flat Embroidery

Standard flat embroidery is the most common technique, where threads are stitched directly onto the fabric in a flat, two-dimensional design. This method is ideal for simple logos and text, providing a clean and professional look. It’s commonly used for team names, numbers, and small logos.

2. 3D Puff Embroidery

3D puff embroidery adds depth and dimension to designs by using a foam material beneath the thread. This technique creates a raised, three-dimensional effect that makes logos and text stand out. It’s particularly effective for creating eye-catching designs and is popular for team emblems and brand names.

3. Digital Embroidery

Digital embroidery involves using computerized machines to stitch intricate designs with precision. This method allows for complex patterns and detailed imagery, making it suitable for advanced designs that require high accuracy. Digital embroidery is ideal for incorporating multiple colors and fine details into sports gear.

4. Appliqué Embroidery

Appliqué embroidery involves stitching a fabric piece onto the base garment, then embroidering around the edges to secure it in place. This technique is used to add large, detailed designs or logos to sports gear. It’s effective for creating standout features and adding texture to the apparel.

Design Principles for Effective Sports Gear Embroidery

Creating impactful sports gear embroidery requires careful consideration of design principles. Here are some key factors to ensure your embroidery is both effective and visually appealing:

1. Simplicity and Clarity

Effective embroidery designs should be simple and clear. Avoid overly complex patterns that may not translate well into embroidery. A clean design with bold lines and distinct shapes ensures that the embroidery remains legible and impactful on sports gear.

2. Color Coordination

Choose colors that complement the team’s existing palette and ensure good contrast between the thread and fabric. Proper color coordination enhances the visibility of the embroidery and ensures that the design stands out. Consider using team colors prominently to reinforce the team’s identity.

3. Placement and Sizing

Strategic placement and sizing of embroidery are crucial for maximizing its impact. Position logos and text where they are most visible and avoid overcrowding the design. Ensure that the size of the embroidery is proportionate to the garment and fits well within the designated area.

4. Quality of Materials

The quality of both the thread and the fabric affects the final result of the embroidery. Use high-quality, durable threads that resist fading and fraying. Select fabrics that can withstand the embroidery process and maintain their appearance over time. Investing in quality materials ensures that the embroidery looks professional and lasts longer.

Choosing the Right Embroidery Service

Selecting the right embroidery service is crucial for achieving the desired results. Consider the following factors when choosing a provider:

1. Experience and Expertise

Look for embroidery services with experience in creating sports gear. An experienced provider will have a good understanding of the unique requirements and challenges of sports apparel embroidery. Review their portfolio to assess their expertise and the quality of their work.

2. Technology and Equipment

Ensure that the embroidery service uses up-to-date technology and equipment. Advanced machines and software contribute to higher precision and better results. A provider with modern equipment can handle complex designs and deliver high-quality embroidery.

3. Customer Service and Support

Choose a service that offers excellent customer support. Clear communication, responsiveness, and a willingness to address any concerns are important for a smooth embroidery process. A good provider will work with you to ensure that the final product meets your expectations.

Conclusion

The art of sports gear embroidery combines creativity, technique, and precision to create apparel that enhances team identity and professionalism. By understanding the significance of embroidery, mastering key techniques, and adhering to effective design principles, teams can achieve striking and functional gear. Selecting the right embroidery service ensures that the final product is of the highest quality. Whether you’re outfitting a professional team or a local sports club, embracing the art of embroidery can elevate your sports gear and foster a strong sense of unity and pride.

Boost Team Spirit with Embroidered Gear

Boost Team Spirit with Embroidered Gear

Boost Team Spirit with Embroidered Gear

Team spirit is a vital component of any successful sports team. It fosters unity, boosts morale, and enhances overall performance. One effective way to strengthen team spirit is through embroidered gear. Customized embroidery adds a personal touch to sports apparel, making it a powerful tool for enhancing team identity and cohesion. In this article, we’ll explore how embroidered gear can boost team spirit and provide practical tips for leveraging this strategy.

The Power of Embroidered Gear in Building Team Spirit

Embroidered gear plays a significant role in cultivating a strong sense of team spirit. Here’s how it contributes to building a unified and motivated team:

1. Strengthens Team Identity

Embroidered gear helps to establish and reinforce team identity. When players wear apparel featuring their team’s logo, name, or mascot, it creates a visual representation of their collective identity. This shared symbol fosters a sense of belonging and pride among team members. Uniformity in appearance also helps to visually communicate the team’s unity to opponents and supporters.

2. Enhances Professionalism

High-quality embroidered gear projects a professional image. When teams wear well-designed and custom-embroidered uniforms, they not only look more polished but also feel more confident. This enhanced professionalism can positively impact performance by instilling a sense of seriousness and commitment in players.

3. Boosts Morale and Motivation

Customized embroidered gear can boost team morale by making players feel valued and special. When each team member receives personalized items, such as embroidered jerseys or warm-up jackets, it demonstrates that their contributions are recognized and appreciated. This personal touch can increase motivation and encourage players to perform at their best.

Designing Embroidered Gear to Maximize Team Spirit

To ensure that embroidered gear effectively boosts team spirit, consider the following design elements:

1. Incorporate Team Colors and Logos

Using team colors and logos in embroidery designs helps to create a strong visual identity. Choose colors that represent the team and incorporate the logo prominently on the gear. This not only reinforces team unity but also makes the gear instantly recognizable. Ensure that the design is consistent across all apparel to maintain a cohesive look.

2. Personalize with Names and Numbers

Adding player names and numbers to the embroidered gear personalizes the apparel and makes each piece unique. This customization allows team members to take ownership of their gear and adds a personal connection to their uniforms. It also helps with identification during games and practices, enhancing team organization.

3. Opt for High-Quality Embroidery

Investing in high-quality embroidery ensures that the gear is durable and looks professional. Quality embroidery not only enhances the appearance of the gear but also stands up to the rigors of sports activities. Choose reputable embroidery services that use advanced techniques and materials to produce lasting and visually appealing results.

Practical Tips for Implementing Embroidered Gear

Here are some practical tips for implementing embroidered gear effectively:

1. Plan Ahead

Start planning the design and production of embroidered gear well in advance of the season or event. This allows time for designing, ordering, and receiving the gear without last-minute stress. Planning ahead ensures that the gear is ready on time and meets the team’s expectations.

2. Involve the Team in Design Choices

Involving team members in the design process can increase their investment in the gear. Solicit feedback on design elements, such as colors, logos, and placement, to ensure that the final product reflects the team’s preferences. This collaborative approach can also enhance team morale by making members feel more connected to the gear.

3. Ensure Proper Fit and Comfort

Choose apparel that fits well and is comfortable for all team members. Properly fitted gear not only looks better but also enhances performance and comfort during activities. Take accurate measurements and consider the preferences of team members to ensure that the embroidered gear meets their needs.

4. Maintain and Care for Embroidered Gear

Proper maintenance and care of embroidered gear are essential to keep it looking its best. Follow the manufacturer’s care instructions to prevent damage and preserve the appearance of the embroidery. Regularly check for any signs of wear and address any issues promptly to extend the life of the gear.

Examples of Successful Embroidered Gear

Here are some examples of how embroidered gear has successfully boosted team spirit:

1. Custom Jerseys with Team Logos

Custom jerseys featuring the team’s logo and colors are a classic example of effective embroidered gear. These jerseys not only unify the team visually but also foster a sense of pride and belonging. Many sports teams use embroidered jerseys to enhance their professional image and team spirit.

2. Personalized Warm-Up Jackets

Personalized warm-up jackets with player names and numbers are a popular choice for sports teams. These jackets provide a cohesive look during warm-ups and create a sense of individual recognition. The personalization adds a personal touch that boosts team morale and motivation.

3. Team Hats and Beanies

Embroidered hats and beanies featuring the team’s logo or mascot are great for supporting team spirit both on and off the field. These items provide a casual yet stylish way for team members and supporters to show their affiliation and pride. They are also excellent for building team cohesion in less formal settings.

Conclusion

Embroidered gear is a powerful tool for boosting team spirit. By strengthening team identity, enhancing professionalism, and boosting morale, custom embroidery plays a crucial role in fostering unity and motivation. When designing embroidered gear, consider incorporating team colors, logos, and personalization to maximize the impact. With high-quality embroidery and thoughtful design, teams can create apparel that not only looks great but also reinforces their sense of belonging and pride. Implementing these strategies effectively will help your team embrace their spirit and perform at their best.

Top Trends in Sports Gear Embroidery for 2024

Top Trends in Sports Gear Embroidery for 2024

Top Trends in Sports Gear Embroidery for 2024

As we move into 2024, sports gear embroidery continues to evolve, reflecting new design trends, technological advancements, and shifts in consumer preferences. From innovative techniques to fresh design aesthetics, embroidery is playing a crucial role in enhancing sports apparel. This article explores the top trends in sports gear embroidery for 2024, highlighting key developments and what they mean for teams and athletes.

1. Advanced Embroidery Techniques

Advancements in embroidery technology are significantly shaping sports gear designs. Here’s a look at the latest techniques making waves:

1.1 3D Puff Embroidery

3D puff embroidery is gaining popularity for its eye-catching, raised effect. This technique involves applying a foam material beneath the embroidery thread, creating a three-dimensional look. It adds depth and texture to logos and designs, making them stand out on sports apparel. This trend is particularly popular for team logos and prominent branding elements.

1.2 Digital Embroidery

Digital embroidery integrates technology with traditional stitching methods. Using advanced software and machines, digital embroidery offers precise and intricate designs with high efficiency. This technique allows for complex patterns and fine details that were previously difficult to achieve, making it ideal for modern sports gear that demands high-quality customization.

1.3 Metallic Threads

Metallic threads are making a comeback in 2024, adding a touch of elegance and sophistication to sports apparel. These threads, which come in gold, silver, and bronze, are used to create striking accents and highlights. They are perfect for team logos, sponsor names, and other design elements that need to stand out.

2. Sustainable and Eco-Friendly Embroidery

Sustainability is a growing concern in the fashion and sports industries. Embroidery is no exception, and several trends reflect this shift towards eco-friendly practices:

2.1 Recycled Materials

The use of recycled materials in embroidery threads and fabrics is becoming more common. Recycled polyester threads, for example, offer an environmentally friendly alternative to traditional threads. Teams are increasingly choosing these sustainable options to reduce their environmental footprint while still achieving high-quality embroidery.

2.2 Eco-Friendly Inks and Dyes

Eco-friendly inks and dyes are also gaining traction. These products are made from natural or less harmful substances, minimizing their impact on the environment. Brands and teams are adopting these options to align with broader sustainability goals and appeal to environmentally conscious consumers.

2.3 Water-Based Adhesives

Water-based adhesives are replacing traditional, chemical-laden options. These adhesives are less harmful to the environment and are more sustainable. They are used in various embroidery applications, ensuring that the final product is both high-quality and eco-friendly.

3. Customization and Personalization Trends

Personalization continues to be a key trend in sports gear embroidery, with an increasing emphasis on unique, individualized designs:

3.1 Player-Specific Embroidery

Embroidery that highlights player names, numbers, and positions is becoming more sophisticated. Teams are opting for custom embroidery that includes detailed player-specific information, making each piece of gear unique to the individual. This trend enhances team unity and provides a personal touch to sports apparel.

3.2 Fan Merchandise Customization

Fan engagement is a major focus, with teams offering more customizable merchandise for supporters. Fans can now personalize their gear with names, favorite numbers, and unique messages. This trend not only boosts fan loyalty but also creates additional revenue opportunities for teams and sports brands.

3.3 Interactive and Dynamic Designs

Interactive and dynamic embroidery designs are gaining popularity. These designs incorporate elements like QR codes or augmented reality features that can be scanned with a smartphone. This technology adds an interactive layer to sports gear, offering fans and players a new way to engage with their apparel.

4. Innovative Design Aesthetics

The aesthetics of sports gear embroidery are evolving, with new design trends emerging:

4.1 Minimalist Designs

Minimalist embroidery designs are trending for their clean and sophisticated look. Simple, understated logos and text create a modern appearance that appeals to a broad audience. This trend is favored for its versatility and ability to complement a variety of sports apparel styles.

4.2 Vibrant Colors and Gradients

Vibrant colors and gradient effects are making a bold statement in 2024. Teams are experimenting with bold color combinations and smooth transitions to create eye-catching designs. This trend is popular for its ability to make sports gear stand out and convey energy and enthusiasm.

4.3 Geometric Patterns

Geometric patterns are becoming increasingly popular in embroidery designs. These patterns offer a modern and stylish look, often incorporating sharp lines and shapes. Geometric designs can be used to create visually striking effects and add a contemporary touch to sports apparel.

5. Integration with Wearable Technology

As wearable technology advances, integrating it with embroidery is becoming a trend:

5.1 Embedded Sensors

Some sports gear now incorporates embedded sensors that can track performance metrics. Embroidery can be used to incorporate these sensors seamlessly into the design of the apparel. This integration provides athletes with valuable data while maintaining a stylish and functional look.

5.2 Smart Fabrics

Smart fabrics that respond to environmental changes are being combined with embroidery. These fabrics can change color or pattern based on temperature or light conditions. Embroidery designs are adapted to work with these smart fabrics, creating dynamic and interactive sports gear.

Conclusion

The trends in sports gear embroidery for 2024 highlight a blend of technological innovation, sustainability, and personalization. Advanced techniques like 3D puff and digital embroidery are enhancing design possibilities, while eco-friendly practices are addressing environmental concerns. Customization remains a significant trend, with a focus on personalized player gear and fan merchandise. Aesthetic trends are leaning towards minimalist designs and vibrant colors, while integration with wearable technology opens new possibilities for interactive sports apparel. By staying abreast of these trends, teams and brands can create sports gear that not only looks great but also meets the evolving needs of athletes and fans.

How to Choose Embroidery Design for Your Sports Team

How to Choose Embroidery Design for Your Sports Team

How to Choose the Best Embroidery Design for Your Sports Team

Selecting the right embroidery design for your sports team is crucial for creating a unified and professional appearance. A well-chosen design not only enhances team identity but also boosts morale and can make a lasting impression. In this guide, we’ll explore key considerations for choosing the best embroidery design for your sports team, including design elements, placement, and practical tips to ensure you make the best choice. How to Choose Embroidery Design for Your Sports Team

Key Considerations for Choosing an Embroidery Design

When selecting an embroidery design for your sports team, several factors should be taken into account to ensure the design aligns with your team’s identity and objectives.

1. Team Identity and Branding

The embroidery design should reflect your team’s identity and branding. Consider the following aspects:

Team Colors: Choose colors that represent your team’s identity and ensure they stand out on the fabric. Consistent use of team colors in the design reinforces brand recognition and unity.

Logo and Mascots: Incorporate your team’s logo or mascot into the design. This helps in establishing a strong visual identity and creates a cohesive look across all team apparel.
Font Style: Select a font that complements your logo and is easy to read. The font should be consistent with your team’s branding and suitable for embroidery, as intricate fonts may not translate well.

2. Design Complexity

The complexity of the design impacts both its visual appeal and the practicality of the embroidery process. Here’s what to consider:

Simplicity vs. Detail: Simple designs are often more effective for embroidery, as intricate details can become distorted or lost. Opt for a design that balances visual appeal with practicality, ensuring it remains clear and recognizable.
Size and Scale: Consider the size of the embroidery design in relation to the apparel. Larger designs may work well on jackets and banners, while smaller, more intricate designs are better suited for items like caps and polos.

3. Placement on Apparel

Where you place the embroidery design on the apparel can significantly affect its visibility and impact. Common placements include:

Front Chest: Ideal for team logos and names. It’s a prominent location that’s easily visible and effective for brand recognition.
Back: Suitable for larger designs or player numbers. The back of jerseys and jackets offers ample space for detailed designs and makes it easy to identify individual team members.
Sleeves: A good location for additional elements like sponsor logos or smaller team symbols. Sleeve embroidery adds a professional touch without overwhelming the main design.

Practical Tips for Choosing the Best Design

To ensure your chosen embroidery design meets your expectations, follow these practical tips:

1. Consult with an Embroidery Professional

Work with an experienced embroidery professional to translate your ideas into a workable design. They can offer valuable insights on design feasibility, color choices, and how different elements will appear on various fabrics. A professional can also provide samples to help you visualize the final product.

2. Consider Fabric and Material

Different fabrics and materials can affect how an embroidery design looks. Consider the following:

Fabric Type: Ensure the design is compatible with the fabric of the apparel. Some fabrics may be more suitable for detailed embroidery, while others might require simpler designs.
Color Contrast: Choose colors that contrast well with the fabric to ensure the design stands out. This is especially important for visibility and readability.

3. Test the Design with Samples

Before committing to a full order, request samples of the embroidery design. This allows you to evaluate the design’s appearance and quality on the actual apparel. Make any necessary adjustments based on the sample to ensure the final product meets your expectations.

4. Budget Considerations

Keep your budget in mind when selecting an embroidery design. More complex designs and larger sizes may increase the cost of embroidery. Plan your budget accordingly and work with your embroidery service to find a design that fits within your financial constraints while still meeting your needs.

Examples of Successful Embroidery Designs

To inspire your choice, here are some examples of successful embroidery designs for sports teams:

1. Classic Team Logos

Simple, classic team logos are always a hit. They offer a timeless look that reinforces team identity and is easily recognizable. For example, many professional teams use embroidered logos prominently on their jerseys and apparel.

2. Modern and Minimalist Designs

Modern designs with clean lines and minimalistic elements can create a sleek, professional appearance. These designs are often favored for their elegance and ease of readability.

3. Personalized Elements

Adding personalized elements such as player names or numbers enhances team spirit and allows for individual recognition. This customization adds a personal touch that is appreciated by both players and fans.

Conclusion

Choosing the best embroidery design for your sports team involves careful consideration of team identity, design complexity, and placement. By focusing on elements that reflect your team’s branding and consulting with professionals, you can create a design that enhances team unity and professionalism. Follow these tips to ensure your embroidery design is both visually appealing and practical, and request samples to confirm the final look before making a full commitment. With the right design, your sports team will not only look great but also project a strong, cohesive identity both on and off the field.